How to use push (storage) CDN zones
Note: This article has been updated to reflect the deprecation of the SFS storage service. SFS has been replaced by the Sonic object storage.
Push zones allow you to use Sonic - PUSHR's S3-compatible object storage service to host your content directly inside our CDN. Sonic is simple to use and since it is a fully managed storage solution, you don't need to do any maintenance or planning when you upload your files. Sonic is also billed hourly, based on used storage space, so you never end up pre-paying for storage that you may never use.
1. Create a push (storage) zone
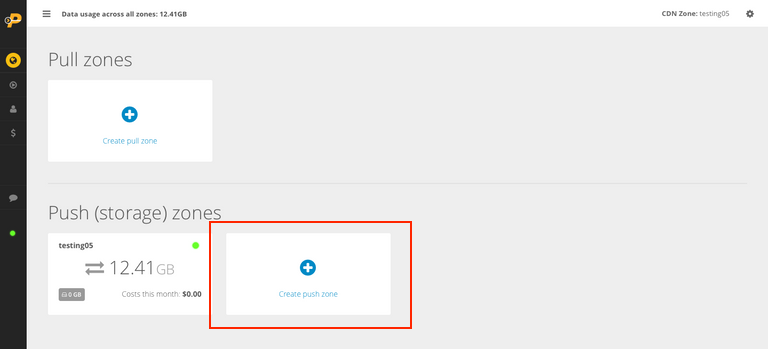
To start, go to the CDN tab in your account dashboard and click on Create push zone:

A window will pop up asking you to name your new zone and to select the type and region for storing your data. The name that you choose can be anything you like. If you want to create more zones later, this name will help you to distinguish among them. technically speaking, a "zone" is simply a set of settings that tell PUSHR how you want your content to be delivered and each zone can have it's own settings.

Sonic offers two different types of storage that come with different options for file management:
• AWS S3-compatible type allows all existing tools and code that work with the S3 APIs to work with Sonic. Content is stored in buckets, and each push zone has it's own bucklet with separate secret and access keys.
• FTP-compatible storage which allows files to be uploaded via the FTP protocol. This storage type may be preferred for its simplicity and works with any FTP client, but is not suitable for integration in services and apps.
2. Find your FTP details or S3 keys
With your new zone created, click on it to enter it's management panel. From then, click on Storage & Hostnames. You will see two tabs - The upper tab is called Content Origin and it will display a FTP server address, username, password and content folder, if the selected storage type is FTP. If S3-compatible type has been selected, an S3 endpoint, secret key, access key and the bucket name will be listed instead:

The various options that you could use to manage your files depend on the selected storage type:
• Web File Manager
The web file manager is available regardless of which storage type is selected. To upload and manage your files directly from your browser, click on the File Manager button. A new browser tab will open. To find more about the features of the file manager, please read the blog post.
• Via FTP
If you've selected the FTP storage type, you can connect to this storage space that was automatically created for your new CDN zone using your favourite FTP client. Inside you will see a directory with the unique ID your CDN zone. Upload all your content there.
• Via the S3 API
Sonic supports a large number of the S3 APIs. See the Developer API section for details.
• Via the deprecated SFS storage API
PUSHR's deprecated storage service - SFS - has had it's storage API being ported to Sonic for compatibility reasons. It is advised to use the S3 API instead .
• Via Rsync
You can request Rsync support by opening a ticket from your account.
• Via Rclone
Rclone is a command-line program to manage files on cloud stores. It supports both FTP and the S3 API and can be used regardless of the selected Sonic storage type.
3. Start serving your content to your visitors
The lower tab on the page is named CDN Hostnames. It will display a unique address which is directly connected to your Sonic storage space. Everything that you upload to your storage will be accessible directly from this address. PUSHR's global edge network of servers will take care to serve your content from the fastest server, closest to your visitors' physical location.

If you upload a file named image.jpg , it immediately becomes accessible from https://[your-cdn-hostname]/image.jpg
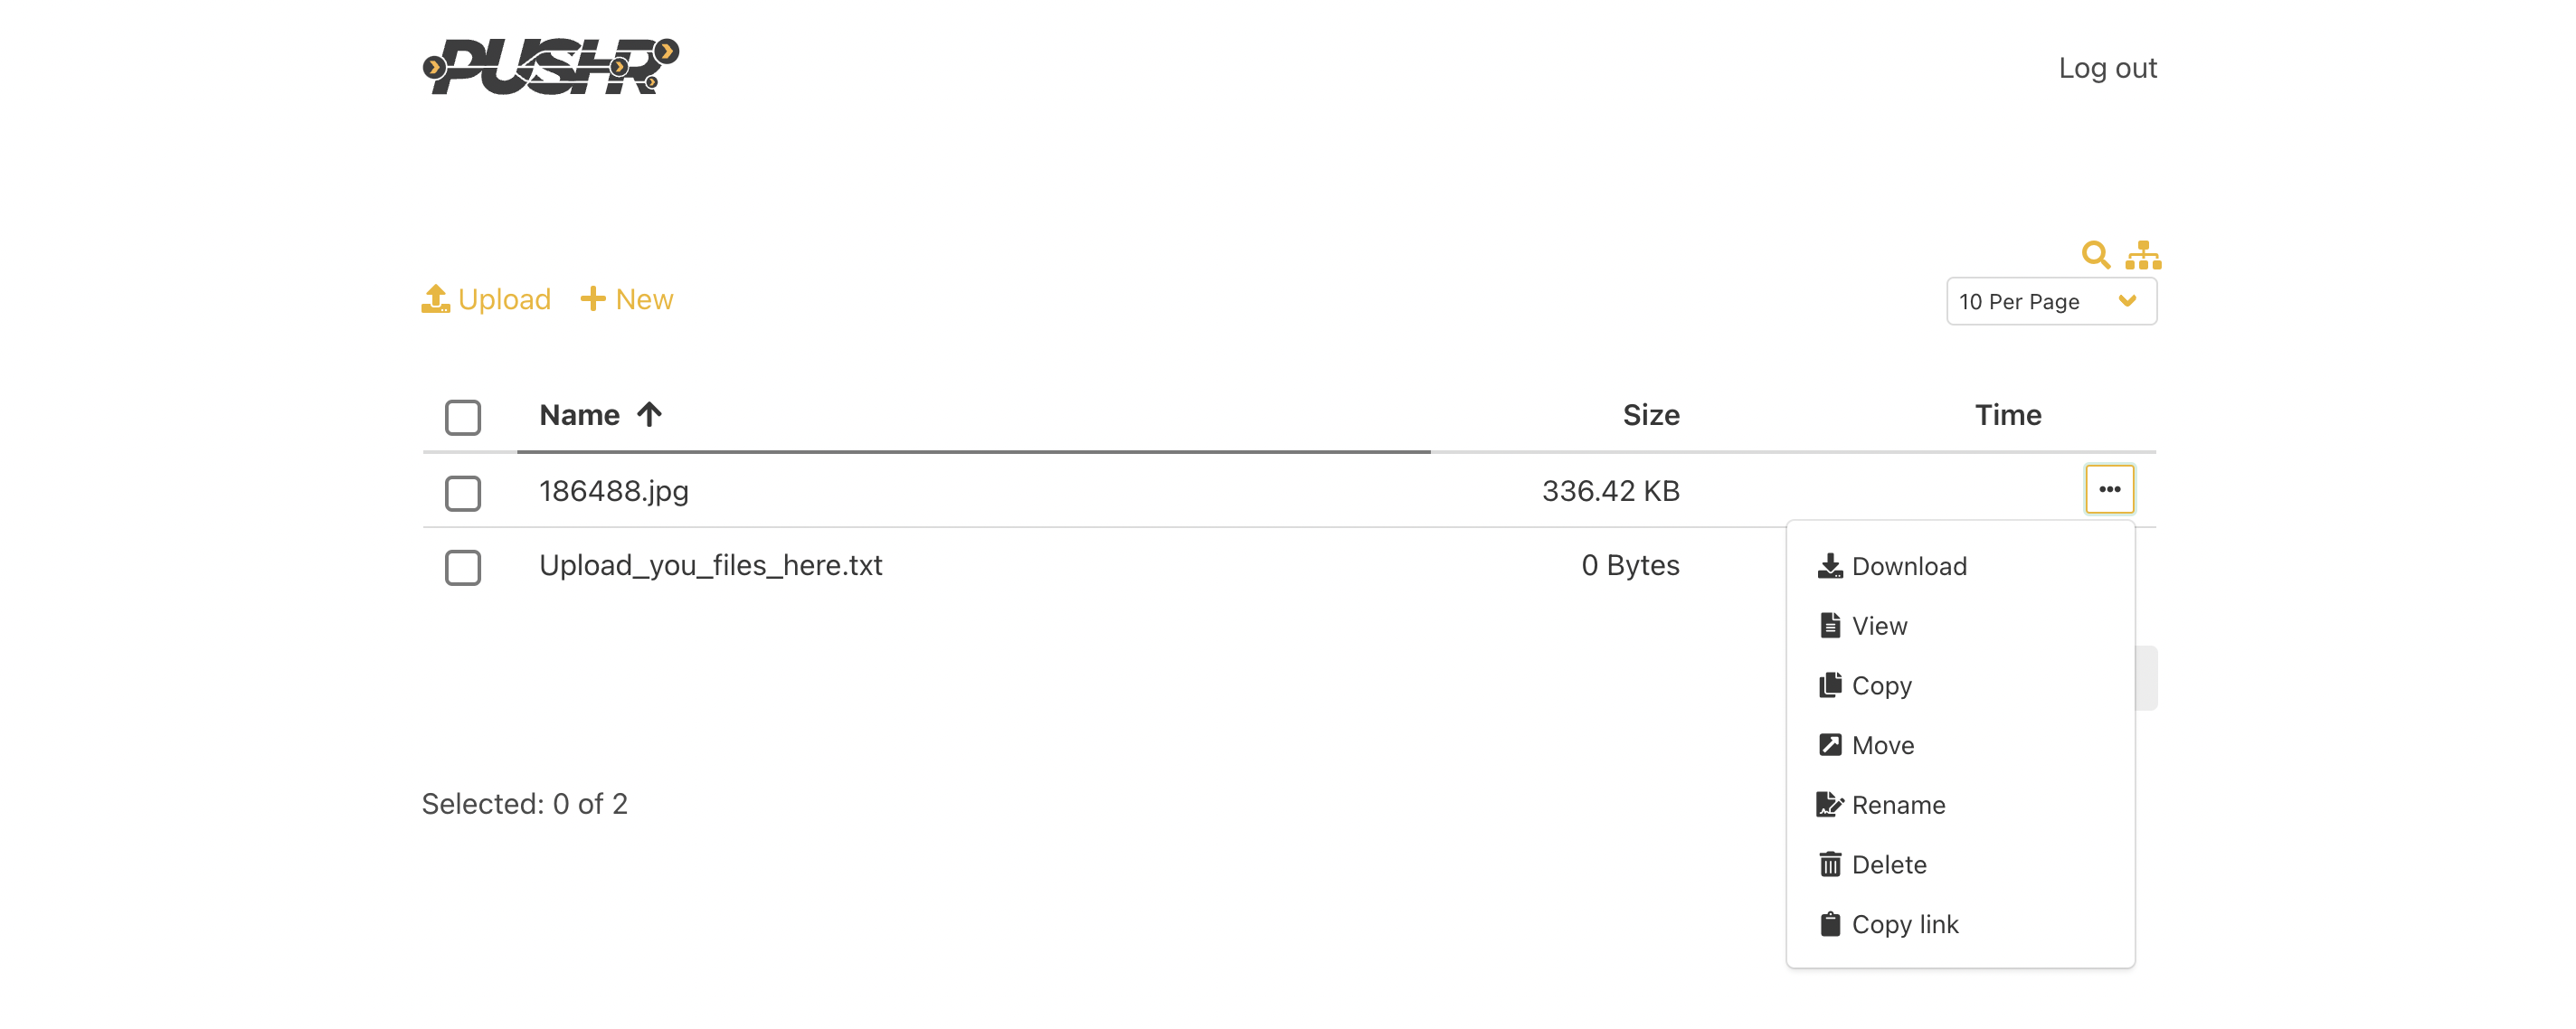
If you are using the web file manager, you can copy the download link directly from the Copy link option in the file menu:

You are all set! Once your visitors start loading your content from the link, you will see analytics data showing up in the Traffic Analytics section of the dashboard. If you want to, you can also create additional hostnames where your content can be downloaded from. These can be branded for a more professional look (for example, cdn.mysite.com) . To do this, continue reading here.
