
Creating custom CDN hostnames
A CDN Hostname is a unique domain name from which PUSHR CDN serves your content to your visitors. When you create a new CDN zone, PUSHR generates this name automatically in the cxxxxzxxxx.r-cdn.com format, where the part before .r-cdn.com is the unqiue identifier of your CDN zone. You can start using this new hostname right away, but in some situations you may prefer to brand your CDN hostname for a more professional look. For example, if you operate the website located at example.com you may prefer to use a hostname like cdn.example.com instead of the default cxxxxzxxxx.r-cdn.com
The process of branding your CDN hostname is easy. You need to create the desired new hostname by creating a DNS record with your name server provider, and then point the new record to the default CDN hostname for your zone. Here is how to do this step by step.
1. Create a CNAME record
To start you need to create a new DNS record with your name servers provider. This usually is the hosting provider where you host your website, unless you are using a separate service for your DNS (like HE, Cloudflare, VULTR cloud, etc.)
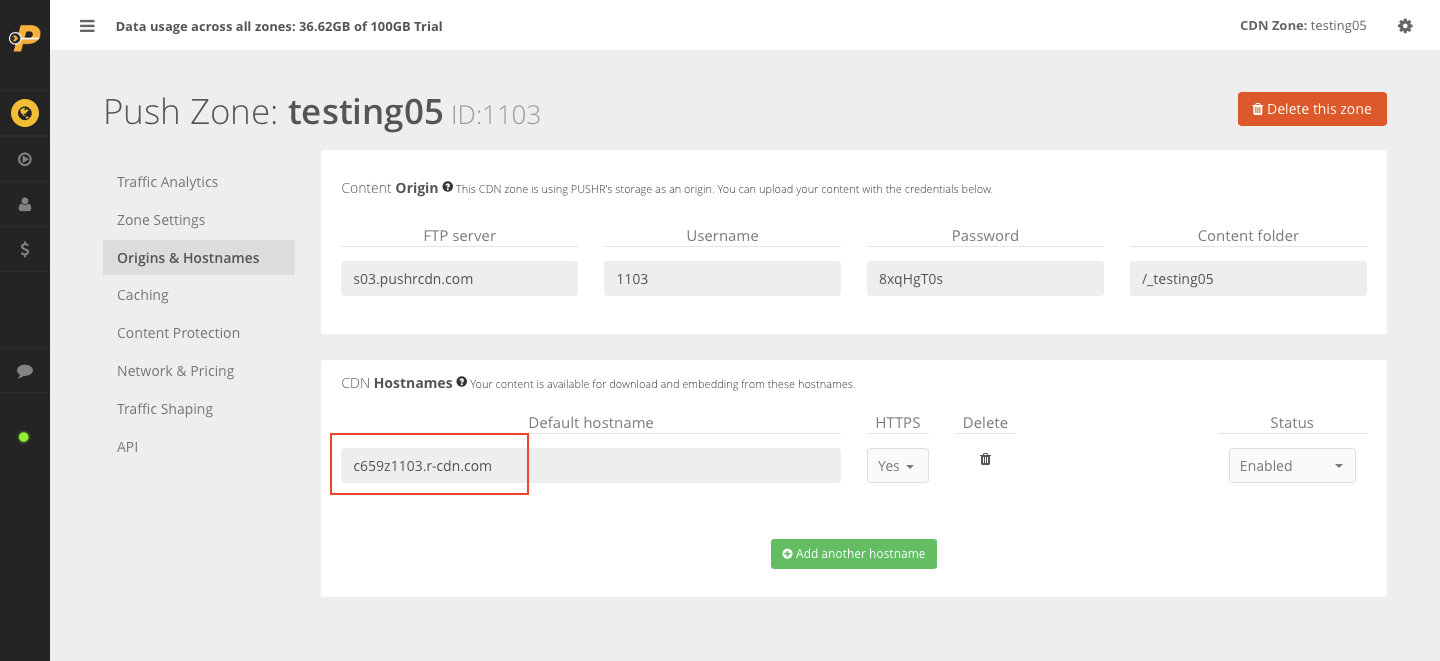
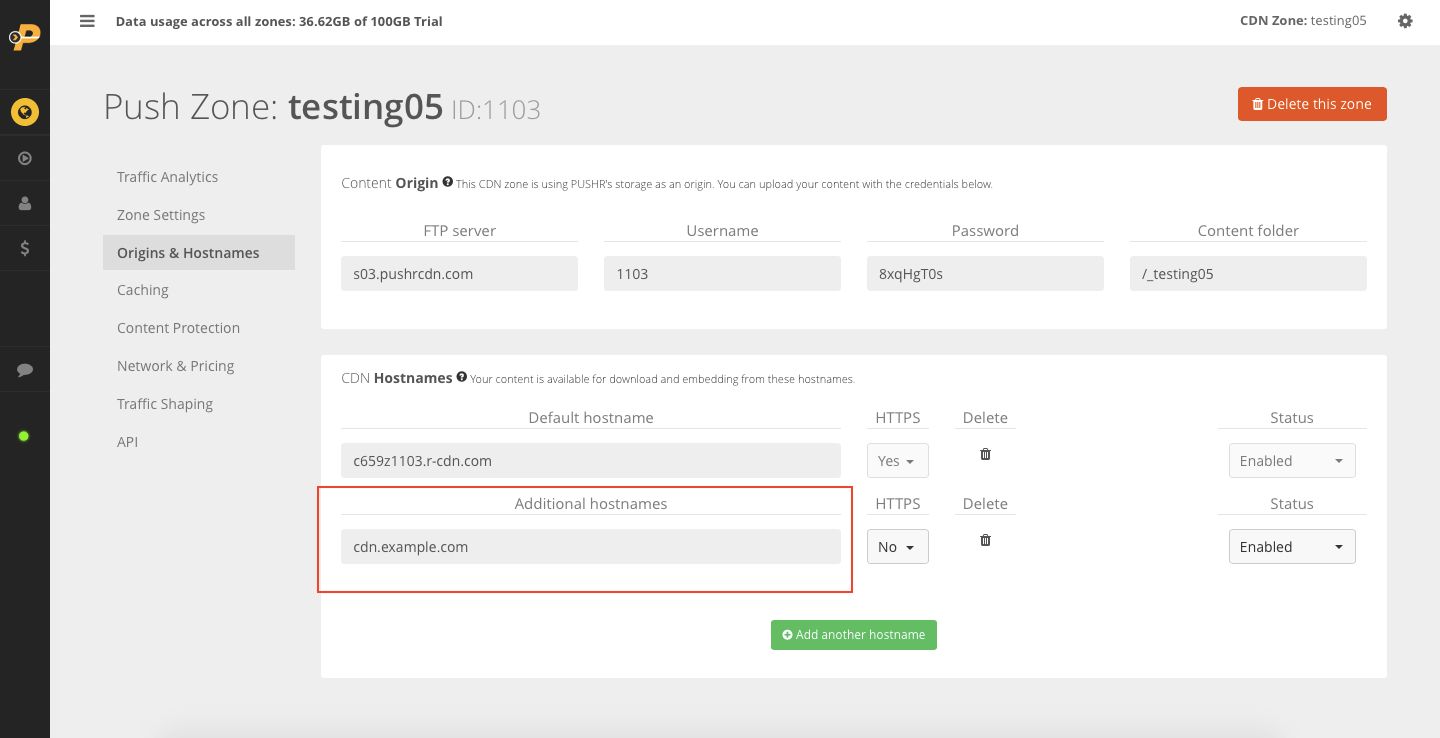
First, copy the default CDN hostname of your CDN zone. Inside your PUSHR account, click on CDN on the sidebar, then click on the CDN zone that you want to create a custom hostname for, and open the Origins & Hostnames tab. The default hostname will be listed there:
It is now time to visit your name server provider's control panel to create the new DNS record. Different providers have different control panels, here is how to do it with the most popular options:
Cpanel
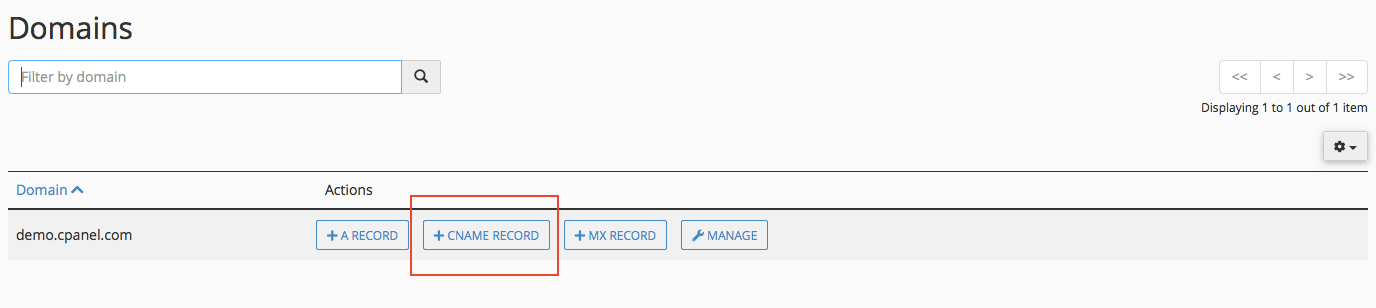
Scroll down to the Domains section in your Cpanel account. Click on Zone Editor:


Save your settings by clicking the ADD A CNAME RECORD button and continue to step 2 below.
Direct Admin
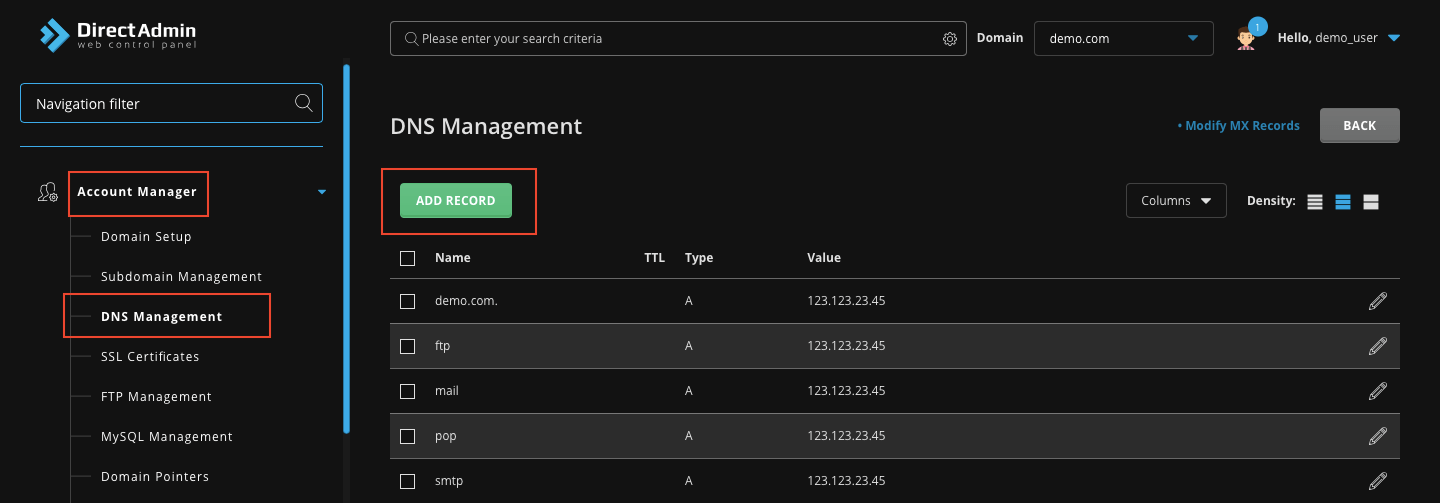
Inside your Direct Admin control panel, click on Account Manager, then DNS Management, then the Add Record button:

Cloudflare
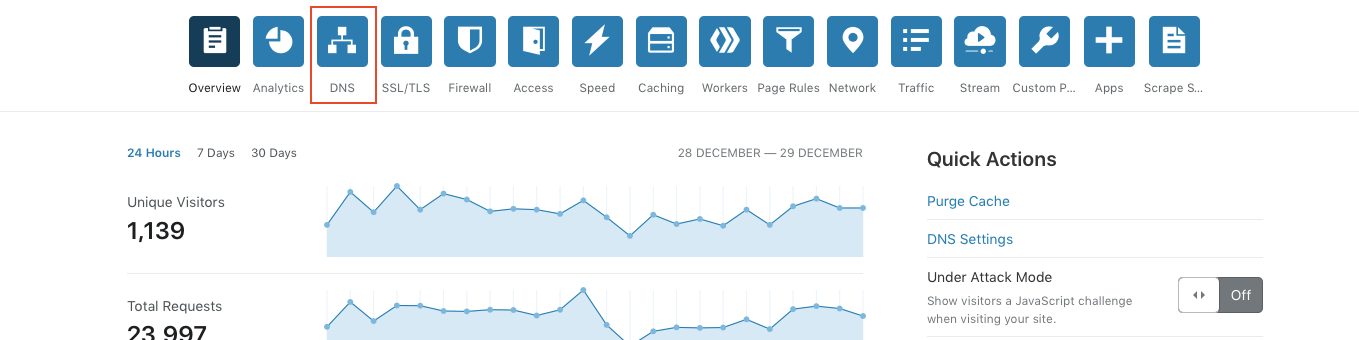
Visit your Cloudflare control panel and click on the DNS button:

The Proxy status setting should be set to DNS only (grey cloud) for best performance. If CNAME Flattening is enabled, it has to be disabled for your new CDN hostname to work.
2. Wait for the new record to propagate on the internet

3. Configure your CDN zone to use the new hostname
Click on the Add another hostname button right under the default hostname in your PUSHR CDN dashboard. In the box that appears enter the new hostname (In this example it is cdn.example.com ). Click the Create button and the box will close.
It will take a few minutes for your new hostname to become active on PUSHR's edge network. Once it does, all your content will be available from your new hostname.
Your default hostname will continue to function properly and you will be able to replace the links in your website, service or app without downtime.
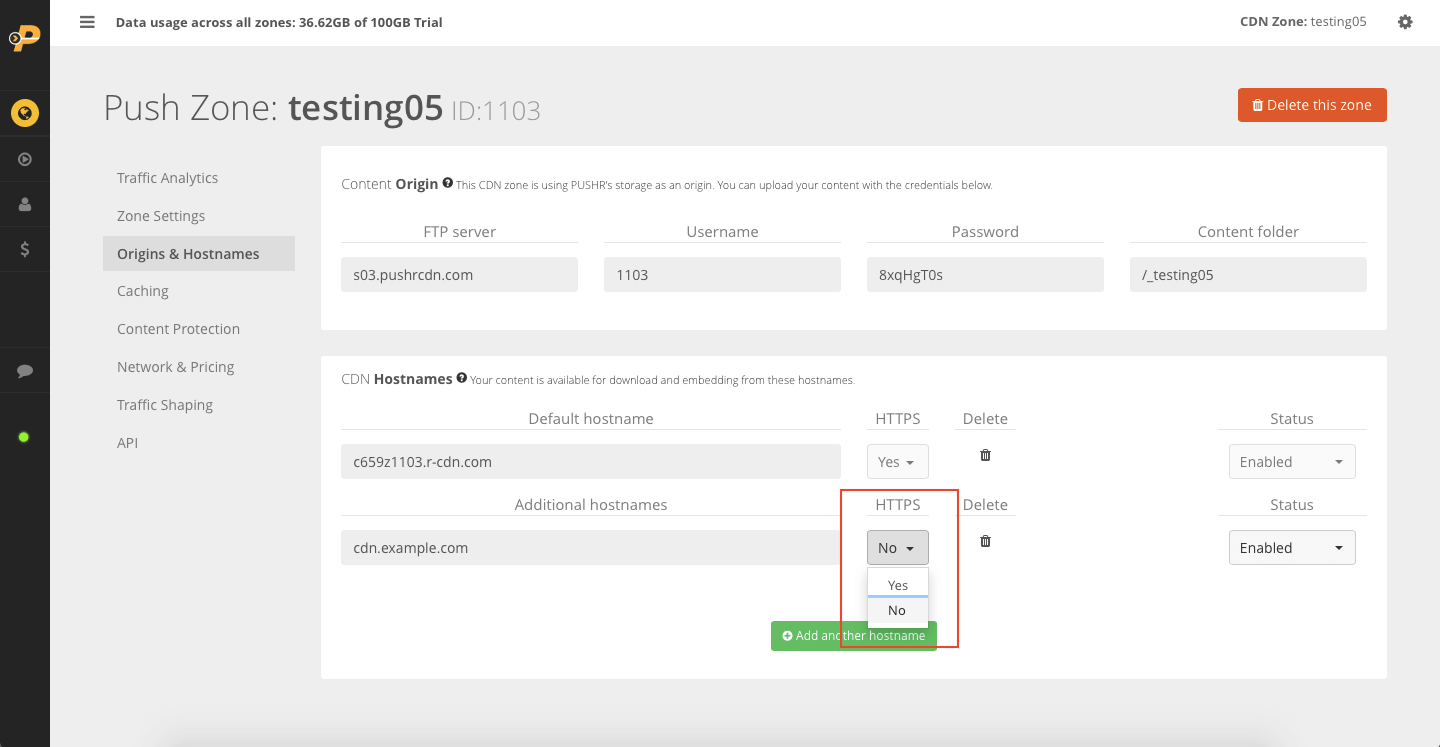
4. Optional: Enable HTTPS with free SSL certificate
PUSHR uses Letsencrypt - a free certificate authority - to issue SSL certificates for your CDN hostnames. Click on the HTTPS dropdown on the right of the newly created hostname and a certificate will be issued automatically:
It will take a few minutes for the SSL certificate to be issues for your new hostname. Once it does, all your content will be available from your new hostname over HTTPS.